In this Photoshop tutorial, we’re going to use some layer effects to make a text style that looks transparent and stunning.
Final Image Preview
Step 1
To begin this tutorial, we’ll first choose a nice background for our text. There’s a fantastic photo of grass on Flickr by 100kr. Now we need a text. We start by typing the text. Notice, we will create a Photoshop style here, so you can use any font you wish

Step 2
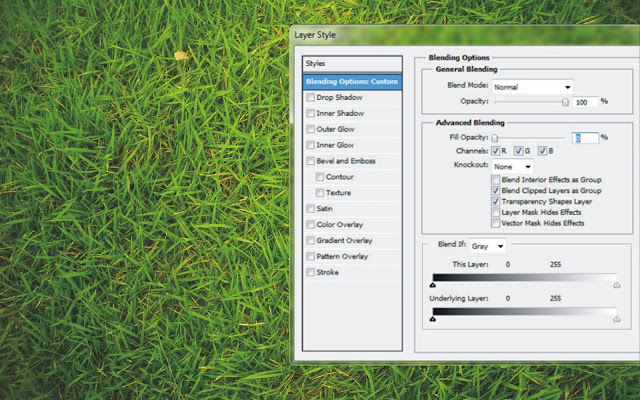
Now we will start using the Layer Style. Double-clicks the text layer to bring up the layer style window. On the first page of the layer style window, change the Fill Opacity to 0%. And you see the text disappear.
Step 3
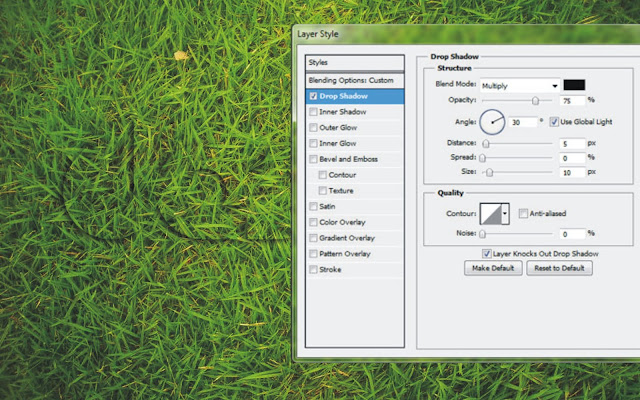
Click on the words Drop Shadow and change the following settings. Don’t click OK yet.
Step 4
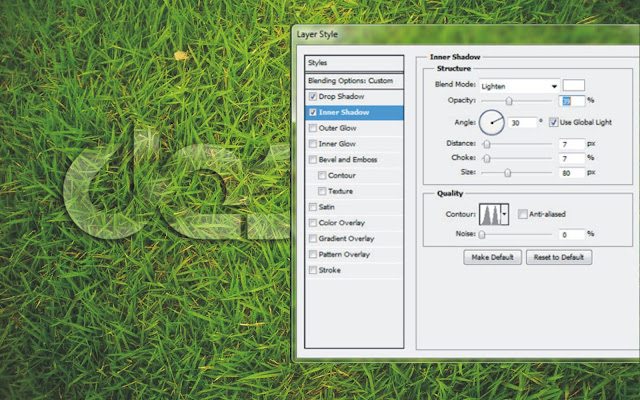
Now add Inner Shadow Style to the text. Don’t click OK yet.
Step 5
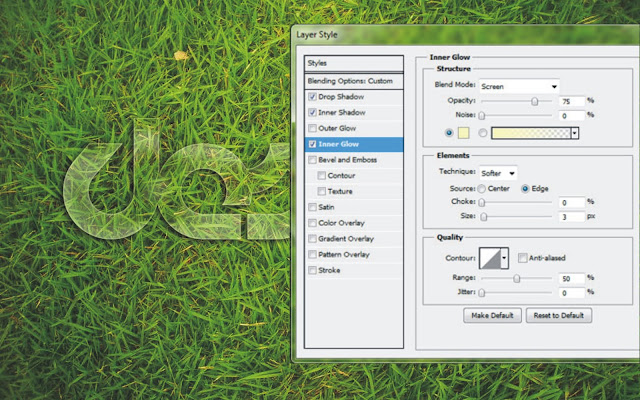
Still in the Layer Effects dialog box, click on the words Inner Glow, Use the settings in the image below, but don’t click OK yet.
Step 6
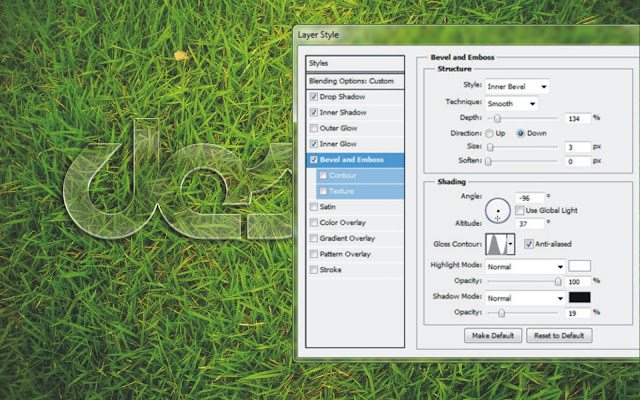
Layer style that we use next is Bevel and Emboss. Screenshot below will provide information on how the settings I use here.
Step 7
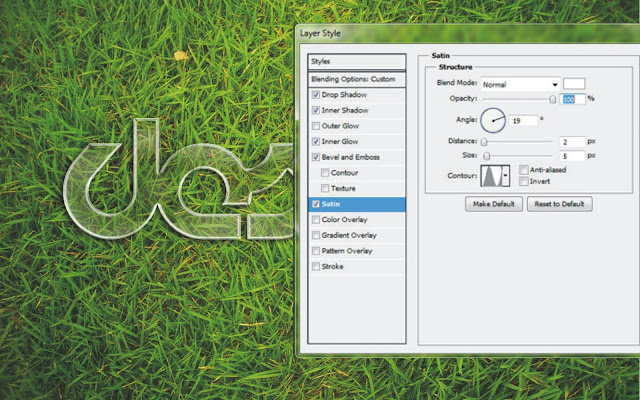
The last step we will give Satin on the text layer. Set Satin like the picture below and press OK when finished.
In any case, you can see all the exact settings by downloading the sample PSD file from the link on the bottom. You can then right click that layer and hit Copy Layer Styles if you just want to paste it into your own file.
Share with your friends
Related Posts
Transparent Glass Text Effect in Photoshop
2012-06-14T05:05:00-07:00
zewDsignet™


Design Art